I’ve been doing the DIY e-juice thing for a little while, really just and only for myself. I’ve hit on 3-4 great flavors that I really enjoy vaping, most of which only required one or two 30ml test batches before I went into full production. Someone in one of my Facebook groups was asking some questions and several of us ended up rambling on for a little while. I wanted to document how I got started because it has really produced some wonderful results.
I wound up spending around $100 to get started between equipment and supplies. In theory this was enough stuff to make around 128-135 30ml bottles, with a chunk of it being reusable (syringes and such). I would need more of certain flavorings to finish all 128+ bottles, but first I needed to find which ones I liked the most.
I try to order most of my e-juice in glass bottles wherever possible, and yes, I hoard them. I am a semi-dormant homebrewer who (really) used to brew a lot of beer so I was familiar already with the “hoarding of glass bottles to refill” process…lol
I watched a bunch of videos on YouTube, as usual. There’s so much great content out there…this was one of the ones I definitely enjoyed.
Ordering Stuff
My first big ordering flurry was from 4 websites. To get the best pricing on what I had heard from friends like Wayne Black (aka Batman) were the best ingredients, I selected the following stuff from these vendors:
Kosher Certified, USP Grade 100% Palm VG – Vaporworld
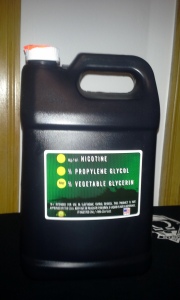
This is some tasty, tasty Vegetable Glycerin. And it’s still on sale for $24.99 a gallon at the moment. I’ve never ordered, used, nor thought about using any sort of sweeteners in any of my e-juices, and it’s purely thanks to this stuff.
And oh. Yeah. I don’t add any PG to my e-liquids (aka, “Max VG”).
Everything I make is as close to 100% VG as is possible with the flavorings I have on hand at the time (many of which are suspended in PG).
Unflavored Nicotine Base (36mg/ml Concentration) – Nude Nicotine
Nude really makes some great stuff. No harsh peppery taste whatsoever in these concentrations, it’s just great and when they say unflavored, they mean it. They will also send you a 15ml sample of their products for the cost of shipping, so you could get started with 15ml of 100mg/ml for like two bucks. I grabbed 250ml of 36mg/ml (100% VG) and it was under twenty. You can get it in 100% VG or 100% PG, as well as either 70/30 option or 50/50 VG/PG.
Water Soluble Flavorings – Wizard Labs and EcigExpress (also later MyFreedomSmokes)
I went with two (and later three due to an awesomely timed sale) folks here since not every flavor I wanted was available from either one. The key thing here is water soluble. One must never use flavorings suspended in oil within e-juice. One more time, for clarity – I recommend that we never, ever use anything suspended in oil. This can potentially cause all sorts of respiratory issues, and the last thing anyone needs to see in the papers (sic) is another reference to lipoid pneumonia vaguely connected with vaping. Big familiar names in the flavoring space include Capella, Flavor West, and The Flavor Apprentice. I grabbed around a dozen or maybe fifteen bottles in my first set of orders.
Equipment and Miscellaneous – Wizard Labs
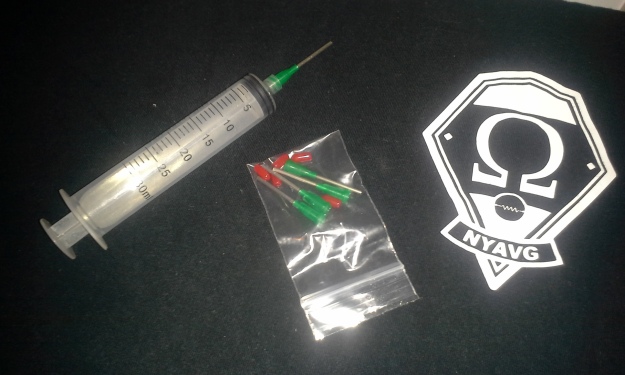
I grabbed some syringes and some needles. I picked up a few 10ml and several 1ml syringes. At this point, I feel compelled to offer a little testimony on my initial experiences with 16ga needles and 100% VG. Wow. This process can be thought of as the epitome of the classic phrase “sucking a basketball through a garden hose”. Just don’t do it, folks. Attempting to suck 25ml of 100% VG into a syringe (yes, that’s 10ml twice, then half full) is not very pleasant. This stuff is very, very thick. I was later told that if you heat your container up a little bit in a bain marie or double boiler type setup, it makes it much thinner. Doing my first batch of 12-15 single note starter batches nearly had me wanting to quit DIYing…lol I knew I needed a bigger syringe.
(Later, also MyFreedomSmokes)
This was my solution to that whole viscosity problem. Much easier to move large quantities of VG around.
After some ritualistic stalking of my letter carrier, I was ready to dive right in.
The Fun Begins – All Before Making My First Batch
To start out, I was told to:
1) When ordering, get several options in each flavor I like. I ordered 8ml samples from pretty much everyone that I could in strawberry, blueberry, vanilla cheesecake, vanilla custard, raspberry, etc. These are a couple bucks each at Wizard and ECigExpress (and can be at MFS when on sale). I knew what I liked after trying a bunch of different flavors, so there was a heavy emphasis on custards, cheesecakes, berries and other bakery goodies.
2) Make single note sample bottles of each flavoring at around a 5 or 10% concentration. I did 10ml samples, so it was like 8ml of VG, 1ml of nic and 1ml of flavoring.
3) Walk away for a couple weeks or force steep. I let the ultrasonic do it’s thing.
4) Test, test, test. Having done this, now I knew that there are some flavorings I prefer from Capella, some flavorings I prefer from TFA, some from Flavor West, etc. I haven’t found a single company that can deliver every flavor yet…taste is of course very subjective.
5) Blend, blend, blend. Having done this, now I knew that in order to make some flavors perfect, I needed to use a mix of Cap/TFA or Cap/FW or Etc. I started to be able to tell which berry worked with which custard, etc. I couldn’t have done this without preparing the testers in Step 4, and this put several of them that were borderline unvape-able to good use. I started by just dripping a few drops of each and then started actually mixing the single note juices together.
6) At this point (a week or two later due to steep time and what-not), I was actually ready to try my first “real” attempt at making juice. I got the four flavorings I use right, but I have had to dick around with the percentages… If I had just dove right in, I probably wouldn’t have gotten it anywhere close to right.
I just use the calculator at Steam Engine these days to let me know how much of what goes into each bottle. I start with 30ml bottles usually and after a round or two of edits/tweaks, graduate to 120ml bottles.
You plug in your batch size on the left, nicotine strengths and flavorings in the center, and set your target nic strengths and VG/PG ratio on the right, and it generates the “how to make it” section. Very cool stuff.


Was wondering if you’d post this out in the wild somewhere.
LikeLike
What do you mean? You’re certainly welcome to link to it from anywhere…:)
LikeLike
good stuf!f i DIY a lot myself we should trade juices some time 🙂
LikeLike
Absolutely, man. My top three homebuilts so far are my Waffle, my Raspberry Cheesecake, and my Caramel Cupcake (still working on this one). I did a pumpkin one for the season but it was all spice and very little pumpkin. I need to get back in there and throw a couple test batches together tonight.
LikeLike